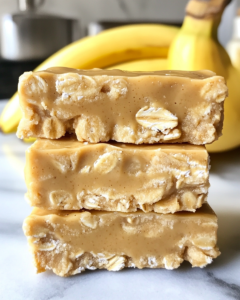
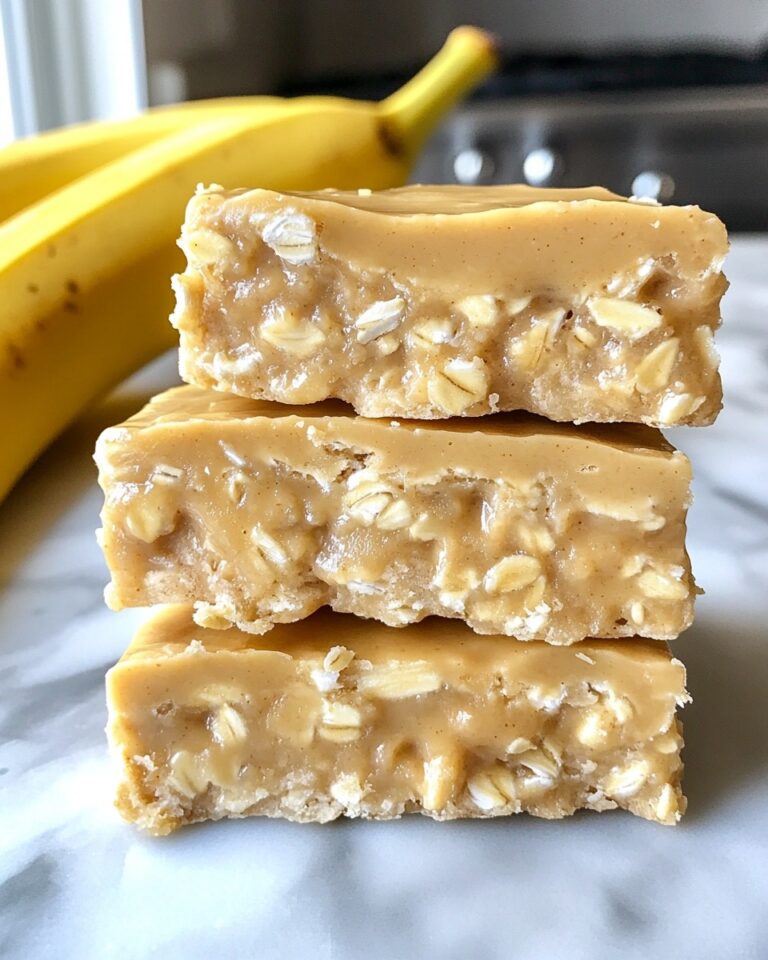
Introduction: No-Bake Peanut Butter Banana Oat Bars | Easy & Satisfying
No-bake recipes are a lifesaver when you’re craving a nutritious and delicious snack without spending hours in the kitchen. These No-Bake Peanut Butter Banana Oat Bars are the perfect combination of chewy, sweet, and wholesome. Made with simple pantry ingredients, they require minimal effort and deliver maximum flavor. Whether you’re meal prepping for the week or need a quick snack, these bars are an excellent choice.
You’ll need a handful of simple ingredients for these No-Bake Peanut Butter Banana Oat Bars, and you can snag them at the best prices on Amazon:
- Old-Fashioned Oats for a hearty, chewy base – Buy them here
- Peanut Butter to add rich, nutty flavor – Shop now
- Ripe Bananas for natural sweetness and binding – Get a deal here
- Honey to enhance the sweetness and stickiness – Grab it here
Stock up on these ingredients today at unbeatable prices and whip up these delicious, no-bake bars in no time!
Why You’ll Love These Bars
- Easy to Make – No oven required!
- Healthy & Nutritious – Packed with fiber, protein, and natural sweetness.
- Perfect for Meal Prep – Make a batch and enjoy throughout the week.
- Customizable – Add nuts, chocolate chips, or dried fruit for variety.
Ingredients
These bars use just a handful of wholesome ingredients:
- 2 cups rolled oats – Provides a chewy texture and fiber.
- 1 ripe banana, mashed – Natural sweetness and moisture.
- ½ cup peanut butter – Creamy and packed with protein.
- 2 tbsp maple syrup or honey (optional) – Adds extra sweetness.
- 1 tsp vanilla extract – Enhances the flavor.
- ½ tsp cinnamon – Adds warmth and depth.
Step-by-Step Instructions
1. Prepare the Ingredients
Mash the ripe banana in a mixing bowl until smooth. The riper the banana, the sweeter and easier it will be to mix.
2. Combine Wet Ingredients
Add the peanut butter, maple syrup (if using), vanilla extract, and cinnamon to the mashed banana. Stir well until everything is fully combined and smooth.
3. Mix in the Oats
Gradually add the rolled oats to the wet mixture, stirring until all the oats are evenly coated.
4. Press Into a Pan
Line an 8×8-inch baking dish with parchment paper. Transfer the oat mixture into the pan and press it down firmly with a spatula or your hands to create an even layer.
5. Chill Until Firm
Place the pan in the refrigerator for at least 1-2 hours or until the bars are firm and set.
6. Slice and Serve
Once chilled, remove the mixture from the pan and cut it into bars or squares. Enjoy immediately or store for later!
Storage Tips
- Refrigerator: Store in an airtight container for up to one week.
- Freezer: Freeze individual bars for up to three months. Let them thaw before eating.

Customization Ideas
- Chocolate Lovers: Add ¼ cup of chocolate chips.
- Nutty Crunch: Stir in chopped almonds or walnuts.
- Dried Fruit Twist: Mix in raisins or cranberries.
- Extra Protein: Add a scoop of protein powder.
Health Benefits
1. Oats – High in fiber, great for digestion and heart health.
2. Bananas – Provide potassium, natural sweetness, and energy.
3. Peanut Butter – A good source of protein and healthy fats.
4. Cinnamon – Contains antioxidants and helps regulate blood sugar.
Tips for the Perfect No-Bake Bars
- Use Fresh Ingredients – Ripe bananas and high-quality peanut butter make a difference in flavor and texture.
- Press Firmly – This ensures the bars hold together well once chilled.
- Chill for Enough Time – Allow at least 2 hours in the fridge for firm bars.
- Experiment with Add-ins – Try shredded coconut, seeds, or a sprinkle of sea salt.
- Cut with a Sharp Knife – For clean edges, use a sharp knife and wipe it between cuts.
Serving Suggestions
- Breakfast on the Go: Pair a bar with a smoothie for a quick and energizing breakfast.
- Afternoon Snack: Enjoy with a cup of tea or coffee.
- Dessert Alternative: Drizzle with melted dark chocolate for an indulgent touch.
- Pre-Workout Fuel: The combination of carbs and protein makes these great before exercise.
Common Mistakes to Avoid
Using Overly Ripe Bananas
While ripe bananas are ideal, overly ripe bananas may make the bars too soft and mushy. Aim for bananas that are spotty but still firm enough to hold shape.
Not Pressing the Mixture Firmly
If the mixture isn’t compacted properly in the pan, the bars might crumble when sliced. Use a spatula or the back of a measuring cup to press down firmly.
Skipping the Chilling Step
Chilling is essential to set the bars properly. If you try to cut them too soon, they won’t hold together well.
FAQs
Can I use instant oats instead of rolled oats?
Yes, but the texture will be softer. Rolled oats provide a chewier consistency.
What can I use instead of peanut butter?
You can substitute almond butter, cashew butter, or sunflower seed butter for a nut-free version.
How long do these bars last at room temperature?
It’s best to keep them refrigerated, but they can last at room temperature for up to 24 hours.
Can I make these bars gluten-free?
Yes! Simply use certified gluten-free oats to make this recipe safe for those with gluten sensitivities.
The Versatility of No-Bake Snacks
No-bake bars are a fantastic option for busy lifestyles. They save time, require minimal cleanup, and can be made with endless variations. Whether you need a grab-and-go snack or a nutritious treat for kids, these bars fit the bill perfectly.
Why These Bars Are a Better Alternative to Store-Bought Snacks
- No Artificial Ingredients – You control what goes into them.
- Lower in Sugar – Natural sweetness from bananas and optional honey.
- More Affordable – Homemade bars cost less than store-bought versions.
- Customizable Flavors – Adjust the recipe to your preferences.
- Better for Digestion – Simple, whole-food ingredients make them easy on the stomach.
Final Thoughts and Why You Should Make These Bars Today
In a world where convenience often trumps nutrition, these No-Bake Peanut Butter Banana Oat Bars stand out as a shining example of how you can have both. They’re quick to make, require no baking, and are packed with wholesome ingredients that fuel your body and satisfy your taste buds. Whether you’re a busy parent, a student on the go, or someone who simply loves a good snack, these bars are designed to fit seamlessly into your lifestyle.
Why These Bars Are a Must-Try
Here’s why you’ll love making and eating these bars:
- Quick and Easy: No baking required—just mix, press, and chill.
- Healthy and Nutritious: Packed with fiber, protein, and natural sweetness.
- Perfect for Meal Prep: Make a batch and enjoy all week long.
- Customizable: Add your favorite mix-ins like nuts, chocolate, or dried fruit.
Health Benefits of the Key Ingredients
These bars aren’t just delicious—they’re good for you too! Here’s what each ingredient brings to the table:
- Oats: High in fiber, great for digestion and heart health.
- Bananas: Rich in potassium and natural sugars for energy.
- Peanut Butter: A great source of protein and healthy fats.
- Cinnamon: Packed with antioxidants and anti-inflammatory properties.
How to Customize Your Bars
One of the best things about this recipe is how easy it is to adapt to your preferences. Here are some ideas to make these bars your own:
- Chocolate Lovers: Add ¼ cup of chocolate chips.
- Nutty Crunch: Stir in chopped almonds, walnuts, or pecans.
- Fruity Twist: Mix in dried cranberries, raisins, or shredded coconut.
- Extra Protein: Add a scoop of protein powder or a handful of seeds like chia or flax.
Tips for Perfect No-Bake Bars Every Time
Follow these tips to ensure your bars turn out perfectly:
- Use Fresh Ingredients: Ripe bananas and high-quality peanut butter make a big difference.
- Press Firmly: Compact the mixture well in the pan to prevent crumbling.
- Chill Thoroughly: Let the bars set in the fridge for at least 2 hours.
- Cut with a Sharp Knife: For clean slices, use a sharp knife and wipe it between cuts.
Serving Suggestions
These bars are incredibly versatile. Here are some ways to enjoy them:
- Breakfast on the Go: Pair with a smoothie or a piece of fruit.
- Afternoon Snack: Enjoy with a cup of tea or coffee.
- Post-Workout Fuel: The combo of carbs and protein makes them ideal for recovery.
- Dessert Alternative: Drizzle with melted dark chocolate for a sweet treat.
Storage Tips
Keep your bars fresh and ready to eat with these storage tips:
- Refrigerator: Store in an airtight container for up to 1 week.
- Freezer: Wrap individual bars and freeze for up to 3 months. Thaw before eating.
Why Homemade Bars Beat Store-Bought Snacks
When you make these bars at home, you’re choosing a healthier, more affordable option. Here’s why:
- No Artificial Ingredients: You control what goes into your food.
- Lower in Sugar: Natural sweetness from bananas and optional honey.
- Cost-Effective: Homemade bars are cheaper than store-bought versions.
- Better for Digestion: Simple, whole-food ingredients are easier on your stomach.
Get Started Today!
Ready to make these delicious bars? Grab your ingredients at the best prices on Amazon:
- Old-Fashioned Oats – Buy them here
- Peanut Butter – Shop now
- Ripe Bananas – Get a deal here
- Honey – Grab it here
Stock up now and start blending these refreshing, energizing smoothies!
Print
No-Bake Peanut Butter Banana Oat Bars
- Total Time: 1 hour 10 minutes – 2 hours 10 minutes
- Yield: 8-10 bars 1x
- Diet: Vegetarian
Description
These No-Bake Peanut Butter Banana Oat Bars are a chewy, healthy, and satisfying snack. Made with oats, banana, and peanut butter, they’re easy to make and perfect for meal prep!
Ingredients
- 2 cups rolled oats
- 1 ripe banana, mashed
- ½ cup peanut butter
- 2 tbsp maple syrup or honey (optional)
- 1 tsp vanilla extract
- ½ tsp cinnamon
Instructions
- Mash the banana in a bowl.
- Add peanut butter, maple syrup, vanilla, and cinnamon. Mix well.
- Stir in rolled oats until evenly coated.
- Press mixture firmly into a lined baking dish.
- Refrigerate for 1-2 hours until set.
- Slice into bars and serve.
- Store in the fridge or freezer for later.
Notes
- Use overripe bananas for natural sweetness.
- Substitute peanut butter with almond or cashew butter.
- Add chocolate chips, nuts, or dried fruit for variety.
- Keep bars refrigerated for the best texture.
- Use certified gluten-free oats if needed.
- Prep Time: 10 minutes
- Cook Time: 1-2 hours
- Category: Snack/Dessert
- Method: No-Bake
- Cuisine: American
Nutrition
- Serving Size: 1 bar
- Calories: 180
- Sugar: 5g
- Sodium: 60mg
- Fat: 9g
- Saturated Fat: 2g
- Unsaturated Fat: 6g
- Trans Fat: 0g
- Carbohydrates: 22g
- Fiber: 3g
- Protein: 5g
- Cholesterol: 0mg
Keywords: no-bake peanut butter bars, healthy oat bars, banana oat snack, easy no-bake recipe, homemade granola bars
