Introduction
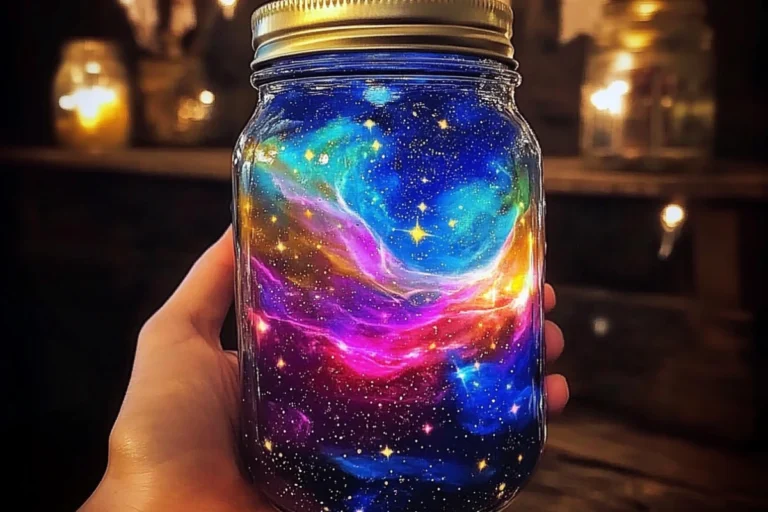
Ever wish you could bottle up the magic of the cosmos and keep it on your desk? Well, you’re about to! Galaxy jars are not just a fun DIY project — they’re tiny, colorful universes you can make with just a few simple materials. Whether you’re a kid, a teen, or a stressed-out adult, making a galaxy in a mason jar is a calming, creative escape into your own little world.
Why Galaxy Jars Are So Magical
There’s just something mesmerizing about swirling colors, glittery stars, and a jar that looks like it holds the secrets of the universe. Galaxy jars tap into our love for space and fantasy — all in a project you can whip up in under 20 minutes!
Perfect for All Ages and Occasions
These jars are fantastic gifts, nightlights, or even party decorations. Plus, the simplicity of the project means anyone can do it — from little ones to grown-ups who need a relaxing craft night.
Materials Needed
Basic Supplies
-
1 clear mason jar (any size)
-
Cotton balls
-
Acrylic paint (black, purple, pink, blue, teal — the more “galaxy” the better!)
-
Water
-
Glitter (silver, iridescent, or holographic work great)
-
Wooden stick or straw for stirring
Optional Additions for Extra Sparkle
-
Glow-in-the-dark paint or glitter
-
Star-shaped confetti
-
Decorative twine or stickers for the outside
Step-By-Step Instructions
Step 1: Prepare Your Workspace
Lay down some old newspaper or a plastic tablecloth — things might get a little messy. Have all your supplies within arm’s reach so you can move quickly through the steps.
Step 2: Fill the Jar with Water and Paint
Pour water until the mason jar is about 1/4 full. Add a few drops of one acrylic paint color into the water. Stir it well with a wooden stick or straw until the color fully mixes in.
Step 3: Add Cotton Balls
Take several cotton balls and stretch them out a bit. Drop them gently into the jar, letting them soak up that colorful water. This creates the soft, cloud-like texture of your galaxy.
Step 4: Sprinkle the Glitter
Sprinkle a pinch of glitter right on top of the soaked cotton. This is where your stars are born!
Step 5: Repeat the Process
Add another 1/4 jar of water, choose a different paint color, and stir. Then layer more stretched-out cotton balls and sprinkle more glitter. Keep alternating colors and layers until the jar is full.
Step 6: Final Touches and Sealing
Top off your galaxy with a final sprinkle of glitter, then screw the lid on tight. If you want, decorate the outside with star stickers, paint little constellations, or wrap twine around the neck of the jar.
Creative Tips and Tricks
Playing with Color Combos
Experiment with color layering to create stunning effects. Dark colors like black and navy can create a deep-space feel, while purples and pinks add a magical nebula vibe.
Using Glow-in-the-Dark Accents
Mix in glow-in-the-dark glitter or paint for a galaxy that comes alive once the lights go out. It’s like having your very own night sky on your nightstand.
Adding Scented Oils for an Extra Surprise
Add a drop or two of lavender or peppermint essential oil into your water layers for a jar that smells heavenly too!
How to Display Your Galaxy Jar
Desk and Shelf Décor
Galaxy jars look stunning perched on a bookshelf, desk, or windowsill. They catch the light during the day and sparkle beautifully.
Nightlight Magic
Place a small LED tealight underneath or behind the jar to make it glow softly — a perfect nightlight for kids or a cozy addition to your bedroom.
Gift Ideas
Wrap a ribbon around the lid and gift it to a friend. It’s a handmade present that feels thoughtful and out-of-this-world unique.
Common Mistakes to Avoid
Over-saturating with Paint
Too much paint can make your water look muddy instead of celestial. Stick to a few drops at a time and build color gradually.
Skimping on Cotton
If you don’t use enough cotton, the colors won’t layer properly and your galaxy will look thin and washed out.
Forgetting to Layer
Layering colors and glitter is the key to that rich, textured galaxy look. Take your time and be intentional with each layer.
Benefits of Making a Galaxy Jar
Relaxation and Mindfulness
Crafting your galaxy jar can be incredibly calming. It’s a hands-on, creative process that pulls you away from screens and stress for a while.
Enhancing Creativity
Choosing colors, blending layers, and adding your own personal touches can really get those creative juices flowing. Plus, the finished product is a reminder that you can make beautiful things with your own two hands.
Conclusion
Creating a galaxy in a mason jar is like capturing a dream. With just a few supplies and a little imagination, you can craft a swirling, sparkling miniature universe that’s all yours. Whether you keep it for yourself or share it with someone special, a galaxy jar is more than just a craft — it’s a tiny piece of magic that reminds you to look up, dream big, and create beauty wherever you can.
FAQs
Can I use food coloring instead of acrylic paint?
Yes, you can! Food coloring works well if you want a more translucent, watercolor-like galaxy.
How long does a galaxy jar last?
If sealed properly, your galaxy jar can last for years. Over time, the cotton might settle a little, but it’ll still look beautiful!
Can I add small stars or shapes inside?
Absolutely! Tiny star confetti or small beads can add extra dimension and make your galaxy look even more magical.
What’s the best size jar to use?
Any size works, but smaller jars (like 8-oz mason jars) are easier to fill and create quicker results, while larger jars allow for more elaborate layering.
Is it safe for young kids?
Definitely, but it’s a good idea for an adult to supervise young children, especially when handling paint and glitter.
Print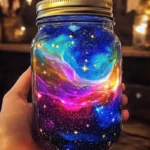
How To Make a Galaxy in a Mason Jar | Easy DIY Craft for All Ages
- Total Time: 20 minutes
- Yield: 1 galaxy jar 1x
Description
Learn how to make your own mesmerizing galaxy in a mason jar using cotton balls, acrylic paints, glitter, and simple materials at home!
Ingredients
1 clear mason jar (any size)
Cotton balls (enough to fill the jar)
Acrylic paint (black, purple, pink, blue, teal)
Glitter (silver, iridescent, or holographic)
Water (as needed)
Wooden stick or straw (for stirring)
Optional: Glow-in-the-dark paint or glitter
Instructions
-
Fill 1/4 of the mason jar with water and mix with a few drops of one paint color.
-
Add stretched cotton balls to absorb the colored water, then sprinkle glitter.
-
Repeat the process with different colors, layering cotton and glitter until the jar is full.
-
Seal the jar and optionally decorate the outside.
-
Display your galaxy jar or use it as a nightlight.
Notes
-
Stretch the cotton balls thinly for better blending.
-
Add glow-in-the-dark glitter for an extra magical effect.
-
Use a wooden stick for easier placement and stirring inside the jar.
-
Make multiple jars with different color combinations for a whole galaxy collection!
- Prep Time: 5 minutes
- Cook Time: 15 minutes (crafting time)
- Category: DIY Crafts
- Method: Layering and Decorating
- Cuisine: Not Applicable
Nutrition
- Serving Size: 1 jar
- Calories: 0
- Sugar: 0g
- Sodium: 0mg
- Fat: 0g
- Saturated Fat: 0g
- Unsaturated Fat: 0g
- Trans Fat: 0g
- Carbohydrates: 0g
- Fiber: 0g
- Protein: 0g
- Cholesterol: 0mg
Keywords: DIY galaxy jar, galaxy mason jar, mason jar craft, galaxy in a jar, homemade galaxy craft, easy galaxy jar